Why it works: Unit 1.3: The image as data
Erode, Dilate, Open and Close a Mask in OpenCV
Clean a colour mask with morphology: erosion shrinks white areas, dilation grows them, opening removes specks and closing fills holes. On the pool table the mask goes from 59 blobs to 14.

A mask straight out of a colour test is full of specks and pinholes, and morphology cleans it by shrinking and growing the white areas.
Where you have met it: Select › Shrink and Select › Grow in GIMP, and Contract and Expand in Photoshop, which erode and dilate a selection; the speckle removal in document scanner apps; cleaning up a green-screen key.
TL;DR. Shrinking the white areas of a mask by a few pixels and growing them back wipes out anything smaller than the shrink, and doing it the other way round fills small holes. On the pool table that takes the not-cloth mask from 59 separate white blobs to 14, one per object, with the smallest balls intact.
The problem
Lesson 2 made a mask of everything that is not cloth, the second step of finding every ball on the table. Inside the table it is close to one white blob per ball, but not quite: specks where the cloth has a worn thread, balls broken into pieces by their stripes, and a ragged strip along the cushions. The next lesson counts blobs, so every speck would count as a ball.
Count the blobs
The first cell rebuilds the mask and keeps only the table. Three of its lines find the table’s outline; lesson 4 explains them.
import cv2
import numpy as np

img = cv2.imread("pool.webp")
hsv = cv2.cvtColor(img, cv2.COLOR_BGR2HSV)
cloth = cv2.inRange(hsv, (75, 80, 40), (100, 255, 255))
# the table's outline: lesson 4 explains these three lines
cs, _ = cv2.findContours(cloth, cv2.RETR_EXTERNAL, cv2.CHAIN_APPROX_SIMPLE)
table = np.zeros_like(cloth)
cv2.fillPoly(table, [cv2.convexHull(max(cs, key=cv2.contourArea))], 255)
objects = cv2.bitwise_and(cv2.bitwise_not(cloth), table)

def blobs(mask):
    return cv2.connectedComponents(mask)[0] - 1
print("blobs:", blobs(objects))blobs: 59
A mask is an array of 0s and 255s like any other image (an image is an array). cv2.connectedComponents gives every separate white region its own number and returns how many numbers it used, counting the black background as one; hence the - 1.
Erode and dilate
Both slide a small square, the kernel, over the mask. Erosion keeps a pixel white only if every pixel under the kernel is white, so white areas lose a border as wide as half the kernel. Dilation makes a pixel white if any pixel under the kernel is white, so white areas gain one [1] [2].
kernel = np.ones((5, 5), np.uint8)
eroded = cv2.erode(objects, kernel)
dilated = cv2.dilate(objects, kernel)
print("eroded:", blobs(eroded), " dilated:", blobs(dilated))eroded: 31 dilated: 24
| Call | What it does to white areas |
|---|---|
cv2.erode(mask, kernel) | shrinks them; anything thinner than the kernel disappears |
cv2.dilate(mask, kernel) | grows them; gaps narrower than the kernel close up |
np.ones((5, 5), np.uint8) | a 5×5 square kernel |
Erosion roughly halves the count, because specks vanish, but every ball also got smaller. Dilation also cuts the count, for the opposite reason: nearby pieces merged into one.
Open, then close
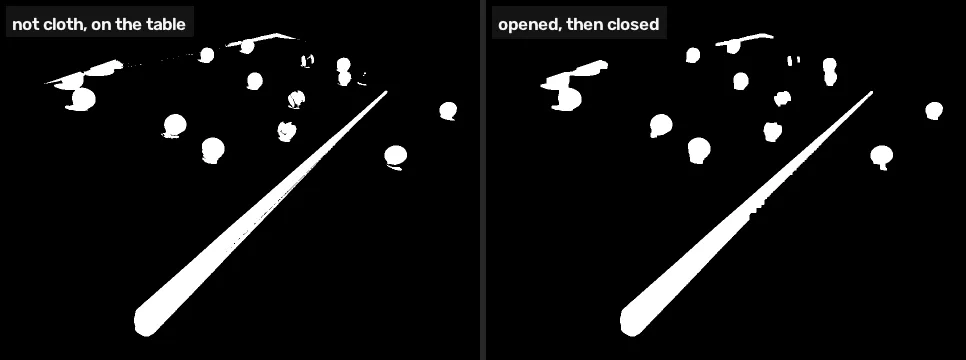
Opening is an erosion followed by a dilation with the same kernel: specks die in the erosion and do not come back, and everything larger grows back to about its old size. Closing is the reverse, a dilation then an erosion, which fills holes and joins pieces that are almost touching [1] [2].
opened = cv2.morphologyEx(objects, cv2.MORPH_OPEN, kernel)
k7 = np.ones((7, 7), np.uint8)
closed = cv2.morphologyEx(opened, cv2.MORPH_CLOSE, k7)
print("opened:", blobs(opened), " then closed:", blobs(closed))
cv2.imshow("opened, then closed", closed)opened: 15 then closed: 14
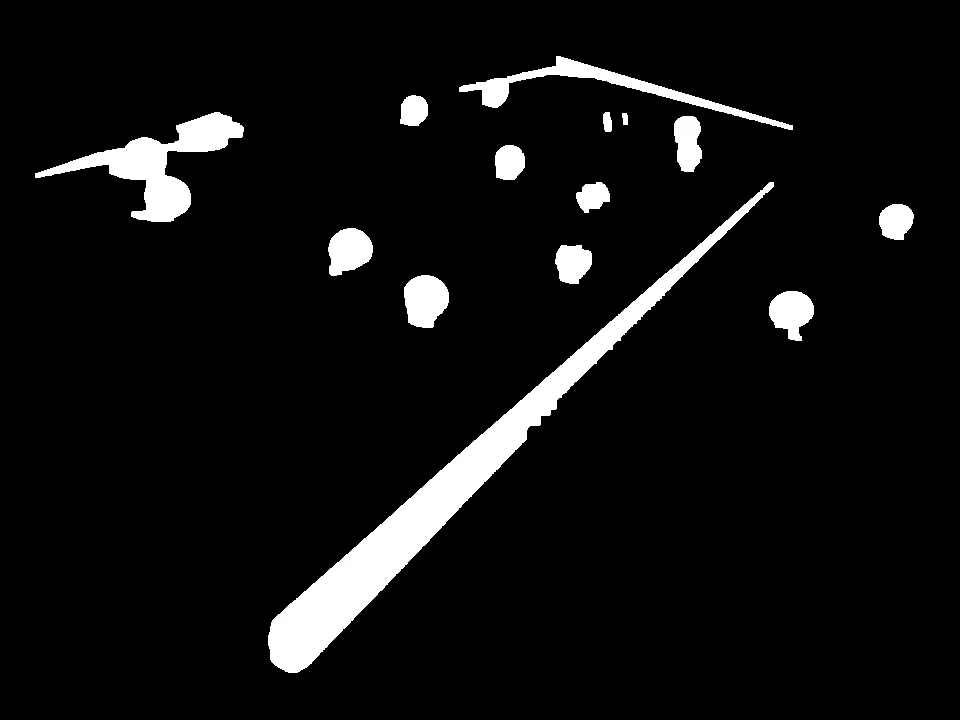
59 blobs become 15 after opening and 14 after closing. The kernel sizes are the two settings that matter: the opening kernel has to be smaller than the smallest ball, and the closing kernel larger than the gaps inside a ball.
Pull the table in
The table’s outline runs along the top of the cushions, so a strip of cushion and the pockets behind the balls near the rail are still inside it. Eroding the table itself, with a much larger kernel, pulls its edge in by about 9 pixels:
table = cv2.erode(table, np.ones((19, 19), np.uint8))
objects = cv2.bitwise_and(cv2.bitwise_not(cloth), table)
opened = cv2.morphologyEx(objects, cv2.MORPH_OPEN, kernel)
closed = cv2.morphologyEx(opened, cv2.MORPH_CLOSE, k7)
print("blobs:", blobs(closed))
cv2.imshow("with the table pulled in", closed)blobs: 14
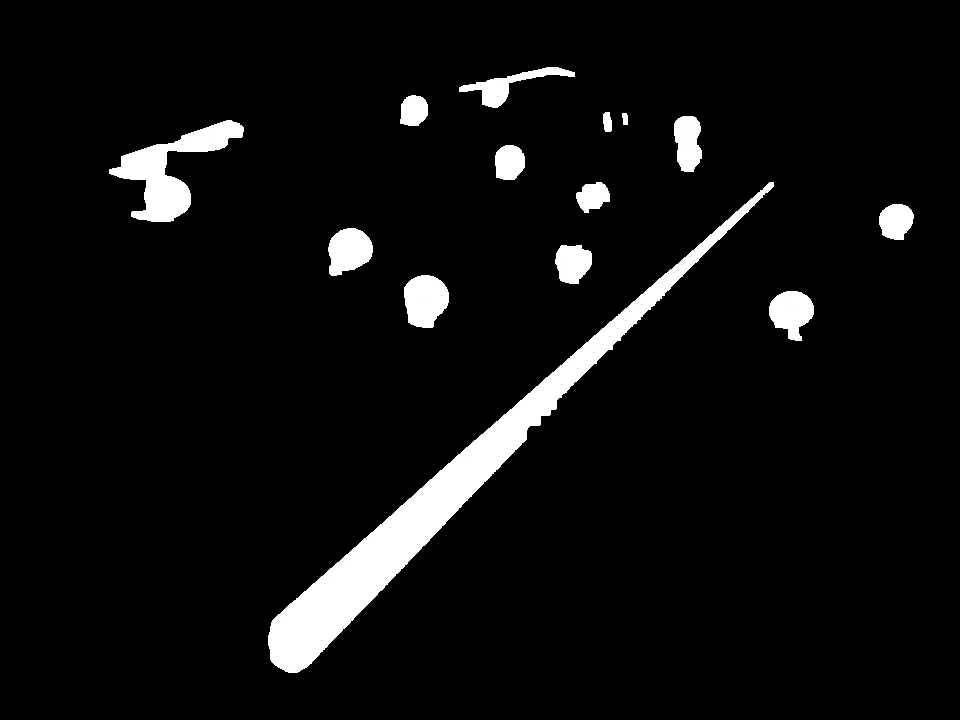
The count stays at 14, by coincidence: a 3,575-pixel strip along the far cushion disappears, and the blob at the left rail that held the two yellow balls, the pocket behind them and a piece of cushion shrinks from 6,737 pixels to 4,815 and sheds a separate piece. This is the mask the rest of the module uses.
Break it
The opening kernel decides what counts as a speck. Make it bigger than the far balls:
big = np.ones((25, 25), np.uint8)
too_much = cv2.morphologyEx(objects, cv2.MORPH_OPEN, big)
print("blobs:", blobs(too_much))
cv2.imshow("opened with 25 x 25", too_much)blobs: 5
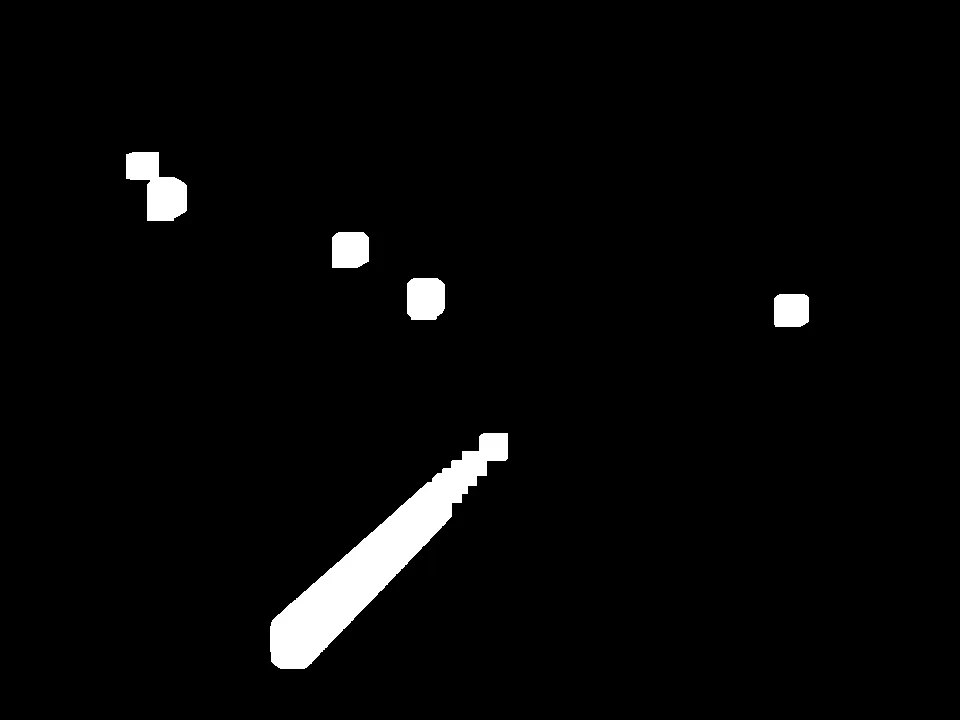
Five blobs are left. Balls at the far end of the table are smaller in the photo than balls near the camera, so they go first, along with the specks. Lesson 5 counts what the module’s final settings find and miss on three photos.
Your turn
Find the largest odd kernel size whose opening still keeps the red ball at x = 494, y = 92.
size = 5  # change this
k = np.ones((size, size), np.uint8)
opened = cv2.morphologyEx(objects, cv2.MORPH_OPEN, k)
print(blobs(opened), opened[92, 494])
Why this works
Erosion and dilation are the two basic operations of mathematical morphology, and opening and closing are defined from them [2]. Opening removes every white region that the kernel cannot fit inside, which is why the kernel size is a size threshold. Closing does the same for black regions, so it fills holes smaller than the kernel. The Fundamentals track covers binary images in unit 2.2, which is planned; until it is written, Gonzalez and Woods chapter 9 is the reference [2].
Common mistakes
- A kernel bigger than the smallest object. Opening deletes it, as the Break it cell shows. Size the kernel from the smallest thing you need to keep.
- Opening and closing in the wrong order. Closing first joins specks to the balls before opening can remove them. Clean the noise first, then fill holes.
- Black objects on white. Morphology in OpenCV acts on white. To clean black objects, invert the mask first or swap erosion and dilation.
References
[1] OpenCV. Morphological Transformations (Python tutorial, doc/py_tutorials/py_imgproc/py_morphological_ops/py_morphological_ops.markdown). OpenCV 4.11.0, commit 31b0eee. github.com/opencv/opencv
[2] Gonzalez, R. C., & Woods, R. E. (2018). Digital Image Processing (4th ed.), section 9.2 “Erosion and Dilation”, p. 696, and section 9.3 “Opening and Closing”, p. 702. Pearson.
[3] MarkBuckawicki. Billiards table 2.JPG (27 Feb 2014). Wikimedia Commons, CC0 1.0. commons.wikimedia.org
