
Why it works: Unit 1.2: Image sensing, Unit 1.3: The image as data
Crop, Resize and Save an Image in OpenCV
Finish the fix: crop the colour chart with array slicing, shrink the photo with cv2.resize and INTER_AREA, and save it with cv2.imwrite, where the same picture is 54 KB as a JPEG and 276 KB as a PNG.
Cropping keeps part of a photo, resizing changes how many pixels it has, and saving writes it to a file; this lesson does all three to the fixed photo.
Where you have met it: the Crop tool in every photo app; the size and quality options of Export or Save As in any image editor.
TL;DR. A crop is a slice of the array, a resize needs its size as width then height, and the file format decides how big the saved picture is. The fixed photo saves as 54 KB at JPEG quality 90 and 276 KB as a PNG.
The problem
The fix from lesson 3, multiplying by 2.4, is the one the project keeps. It is the last step of the project. What is left is what you would do with any photo you are about to share: keep the interesting part, make it smaller, write it to a file.
Crop, resize, save
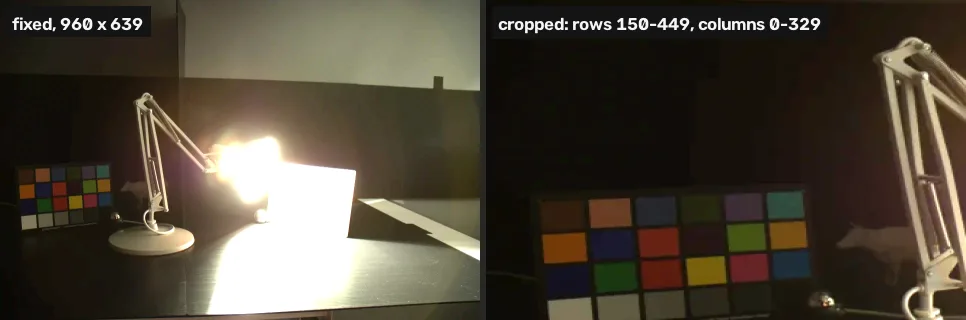
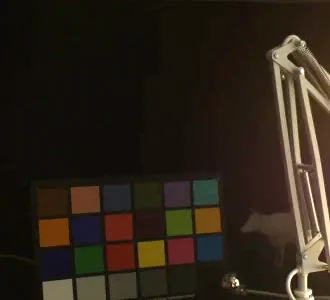
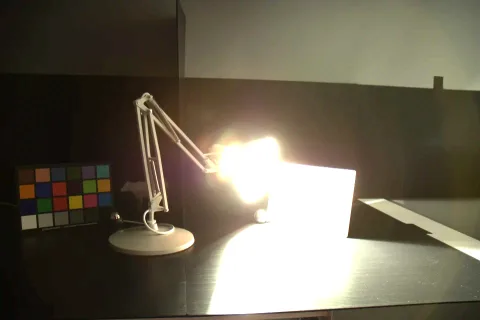
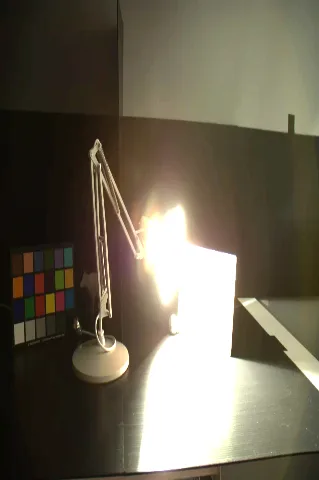
A crop needs no function. The image is an array (lesson 1), so fixed[150:450, 0:330] is rows 150 to 449 and columns 0 to 329: the colour chart and the lamp’s arm. cv2.resize takes the new size as (width, height) and an interpolation method; the OpenCV tutorial recommends INTER_AREA for shrinking [1]. cv2.imwrite picks the format from the file name, and takes format options as a list [2].
import os
import cv2

fixed = cv2.convertScaleAbs(cv2.imread("dark.webp"), alpha=2.4)
chart = fixed[150:450, 0:330]  # rows 150-449, columns 0-329
thumb = cv2.resize(fixed, (480, 320), interpolation=cv2.INTER_AREA)

cv2.imwrite("fixed.jpg", fixed, [cv2.IMWRITE_JPEG_QUALITY, 90])
cv2.imwrite("fixed.png", fixed)
for name in ("fixed.jpg", "fixed.png"):
    print(name, os.path.getsize(name) // 1024, "KB")
cv2.imshow("the crop", chart)
cv2.imshow("the thumbnail", thumb)fixed.jpg 54 KB fixed.png 276 KB
| Call | What it does |
|---|---|
img[r0:r1, c0:c1] | a crop: rows r0 to r1 - 1, columns c0 to c1 - 1 |
cv2.resize(img, (w, h), interpolation=cv2.INTER_AREA) | a new size, width first; INTER_AREA for shrinking |
cv2.imwrite(name, img, [cv2.IMWRITE_JPEG_QUALITY, 90]) | saves; JPEG quality runs 0 to 100 and defaults to 95 [2] |
The JPEG is about a fifth of the PNG. JPEG throws away detail the eye is least sensitive to, and PNG keeps every value unchanged. For a photo to share, JPEG or WebP; for anything you will measure again, PNG, because a JPEG changes the numbers.
The crop is a view into fixed, not a copy: change a pixel of chart and the same pixel of fixed changes. Call .copy() when you want them independent.
Break it
img.shape gives (height, width). cv2.resize wants (width, height). Pass the shape’s order and the photo comes out stretched the wrong way.
# cv2.resize takes (width, height); img.shape is (height, width)
h, w = fixed.shape[:2]
squashed = cv2.resize(fixed, (h // 2, w // 2))
print("asked for", (h // 2, w // 2), "got shape", squashed.shape)
cv2.imshow("width and height swapped", squashed)asked for (319, 480) got shape (480, 319, 3)
Your turn
Resize fixed to 320 pixels wide, keeping its proportions, and store it in small.
small = fixed  # resize to 320 pixels wide, keeping the proportions
print(small.shape)
Why this works
Shrinking a photo is resampling it on a coarser grid, and each new pixel’s value has to be interpolated from the old ones [4]. Picking values without averaging over the area each new pixel covers causes aliasing, the stair-steps and moiré of Sampling: the pixel grid. OpenCV describes INTER_AREA as “resampling using pixel area relation” that “gives moire’-free results” when shrinking [5], and INTER_LINEAR, the default of cv2.resize, as plain bilinear interpolation. What JPEG discards, and what that does to measurements, is in File formats and compression.
Common mistakes
- Width and height swapped. The Break it cell.
- Editing a crop and changing the original. Slices are views; use
.copy(). - Saving with
.jpgand measuring the file later. JPEG changes pixel values; keep a PNG of anything you will analyse. - Leaving the default interpolation when shrinking a lot.
cv2.resizedefaults toINTER_LINEAR, which interpolates between a few neighbours rather than averaging the whole area, so large reductions can alias [5].
References
[1] OpenCV. Geometric Transformations of Images, section “Scaling” (Python tutorial, doc/py_tutorials/py_imgproc/py_geometric_transformations/py_geometric_transformations.markdown). OpenCV 4.11.0, commit 31b0eee. github.com/opencv/opencv
[2] OpenCV. ImwriteFlags in modules/imgcodecs/include/opencv2/imgcodecs.hpp. OpenCV 4.11.0, commit 31b0eee. github.com/opencv/opencv
[3] Fairchild, M. D. (2007). The HDR Photographic Survey. IS&T 15th Color Imaging Conference, pp. 233–238. doi:10.2352/CIC.2007.15.1.art00044
[4] Gonzalez, R. C., & Woods, R. E. (2018). Digital Image Processing (4th ed.), section 2.4 “Image Sampling and Quantization”, Image Interpolation, p. 61, and section 4.5 “Extensions to Functions of Two Variables”, Aliasing in Images, p. 279. Pearson.
[5] OpenCV. InterpolationFlags and resize in modules/imgproc/include/opencv2/imgproc.hpp. OpenCV 4.11.0, commit 31b0eee. github.com/opencv/opencv